One of the great things about WIA is that the marketplace was closed on the last day. This enabled vendors to drop into a few of the presentations before heading home. One of the talks I was looking forward to was Chris Schwarz’s chairmaking process. His demo, as always, was less than dogmatic about how to approach any particular operation. It was because of this openness that his stance on glue choice was startling in its inflexibility. Chris put it simply, “There is no choice.” He declared without hesitation that hide glue was the only appropriate option for gluing this joinery. He mentioned a few of the many reasons for such a strong stance but especially emphasized the importance of reversibility for mistakes and future repairs. My regular readers will not be surprised to hear I was delighted to hear such an impassioned standpoint as this.
Although he demonstrated the glue-up with Titebond liquid hide glue, he also mentioned that he likes using the simple DIY liquid hide glue recipe I posted on the Workbench Diary a while back. Because he directed them to my former blog, I thought I should repost the content here for easier reference.
Here it is:
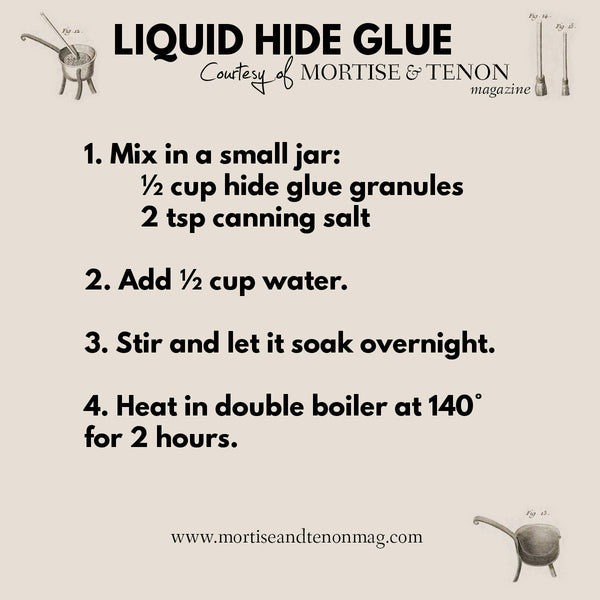
The above image is a small printable jpg for you to print out to tack it up in your shop. For the larger version click here. The salt is canning (non-iodized) salt. The gram strength of the glue is 192. The water is just from the tap. You can make your own glue pot. If you want to see a demo of mixing this glue, check out our new Apprenticeship Foundations video where we walk through this simple process.
You can purchase premixed liquid hide glue if you insist but I mix my own because I believe freshness is the most critical factor in glue integrity. I mix up small amounts at a time to ensure I don’t let a batch sit around for more than a month.
Any questions about liquid hide glue?